Organizing Accountability Chart™ Seats
Discover how to add, remove, and reorganize seats on the Accountability Chart.

Written by Tommy Mains
Updated at July 27th, 2024
-
 Account Options and Troubleshooting
-
 Integrations
-
 Getting Started
-
 Insights
-
 Scorecard
-
 Rocks
Rocks
-
 To-Dos
-
 Issues
-
 Meetings
-
 Headlines
-
 V/TO
V/TO
-
 Accountability Chart
-
 1-on-1
-
 People and Toolbox
-
 Directory
-
 Knowledge Portal
-
 Assessments
-
 Mobile
-
 Maz
Maz
Customize your Accountability Chart™ by adding, editing, and organizing the Seats to fit your needs.
Users with Manager or higher permissions can organize the Accountability Chart in the following ways:
- Creating new Seats
- Assigning users to a Seat
- Deleting Seats
- Rearranging Seats
- Cloning Seats
Click through the tabs below to learn how.
Creating New Seats
To create a new Seat on your Accountability Chart:
- Click Accountability Chart from the left navigation.
- Click Edit Chart at the top right of the page.
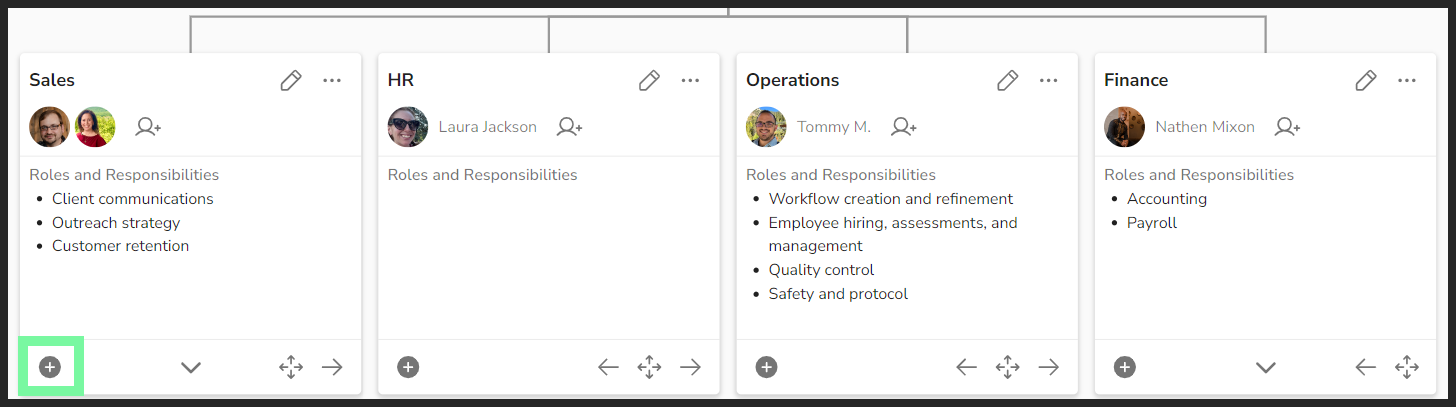
- Click the plus sign on the bottom left of the Seat's card the new Seat will report to.
- Write the Seat's title in the popup.
- (Optional) Click the plus signs to add Roles and Responsibilities for the Seat or add attachments.
- Click Create.
Assigning Users
To assign a user from your Directory to a Seat: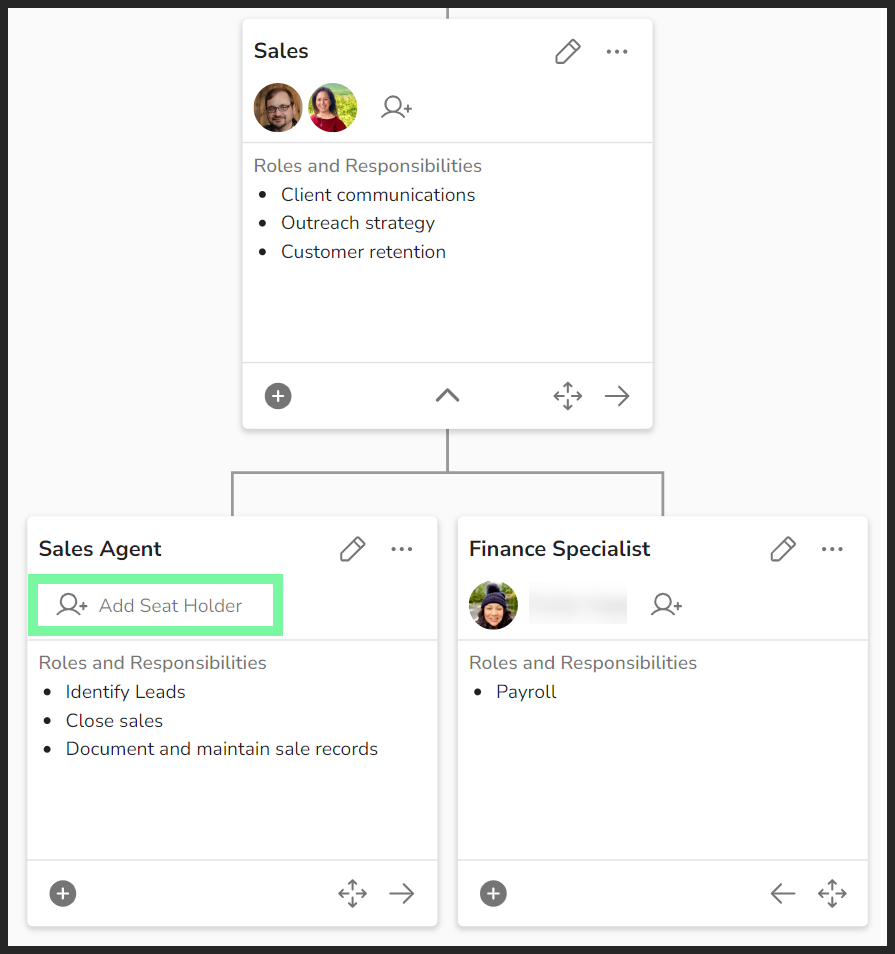
- Click Accountability Chart from the left navigation.
- Click Edit Chart at the top right of the page.
- Click the person-plus icon on the Seat's card.
- To find the Seat you're assigning someone to, you may need to click the down arrows to expand departments/teams.
- Click the user's name from the popup.
Changes are saved automatically.
Deleting Seats
To delete a Seat card from your Accountability Chart:
- Click Accountability Chart from the left navigation.
- Click Edit Chart at the top right of the page.
- Click the ellipses at the top right of the Seat's card.
- To find the Seat you're looking for, you may need to click the down arrows to expand departments/teams.
- Click Delete Seat from the popup.
If you delete a Seat that has Seats that report to it, those Seats (called the Seat's “children” by the platform) will also be deleted.
Rearranging Seats
You can rearrange the Seats on the Accountability Chart using arrows to slide the cards left or right or by moving a Seat under a new manager/parent Seat. Changes are saved automatically.
To move a Seat left or right on the Accountability Chart:
- Click Accountability Chart from the left navigation.
- Click Edit Chart at the top right of the page.
- Click the left or right arrows to move the Seat's card to the preferred location.
To move a Seat under a different Seat:
- Click Accountability Chart from the left navigation.
- Click Edit Chart at the top right of the page.
- Click the four-directional arrows icon.
- Click the new Manager Seat from the dropdown.
- Click Save.
Cloning Seats
You can clone an existing Seat to copy over the same title, roles, responsibilities, and attachments to a new Seat.
To clone an existing Seat:
- Click Accountability Chart from the left navigation.
- Click Edit Chart at the top right of the page.
- Click the ellipses at the top right of the Seat's card.
- Click Clone Seat from the popup.
This process does not clone any Seats under the cloned Seat.